Streaming Interface Configuration
Overview
A streaming interface to allow near-real-time data flow directly to the customer endpoint is available for all customers.
Fleets customers are able to self-create and configure the streaming interface properties.
Step #1: Open the Streaming Page
The streaming configuration page is unique per Fleet.
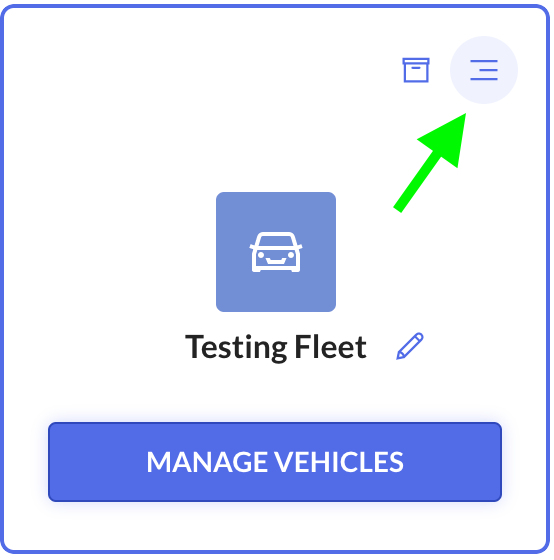
- Select the desired Fleet and press the right button on the top of the Fleet card
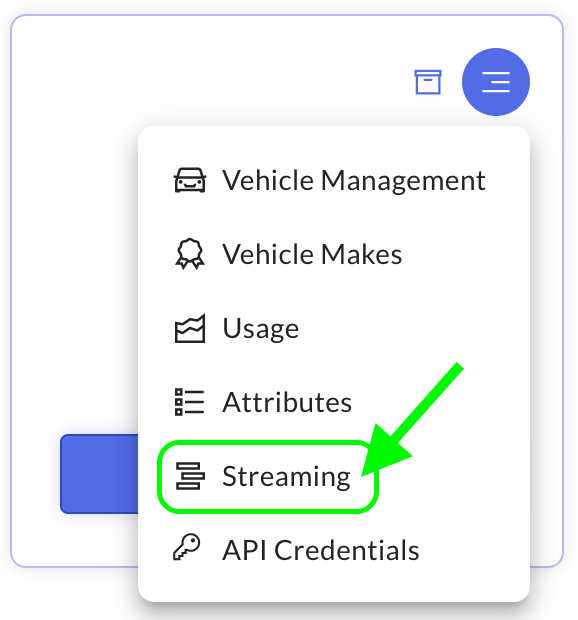
- Select the Streaming option
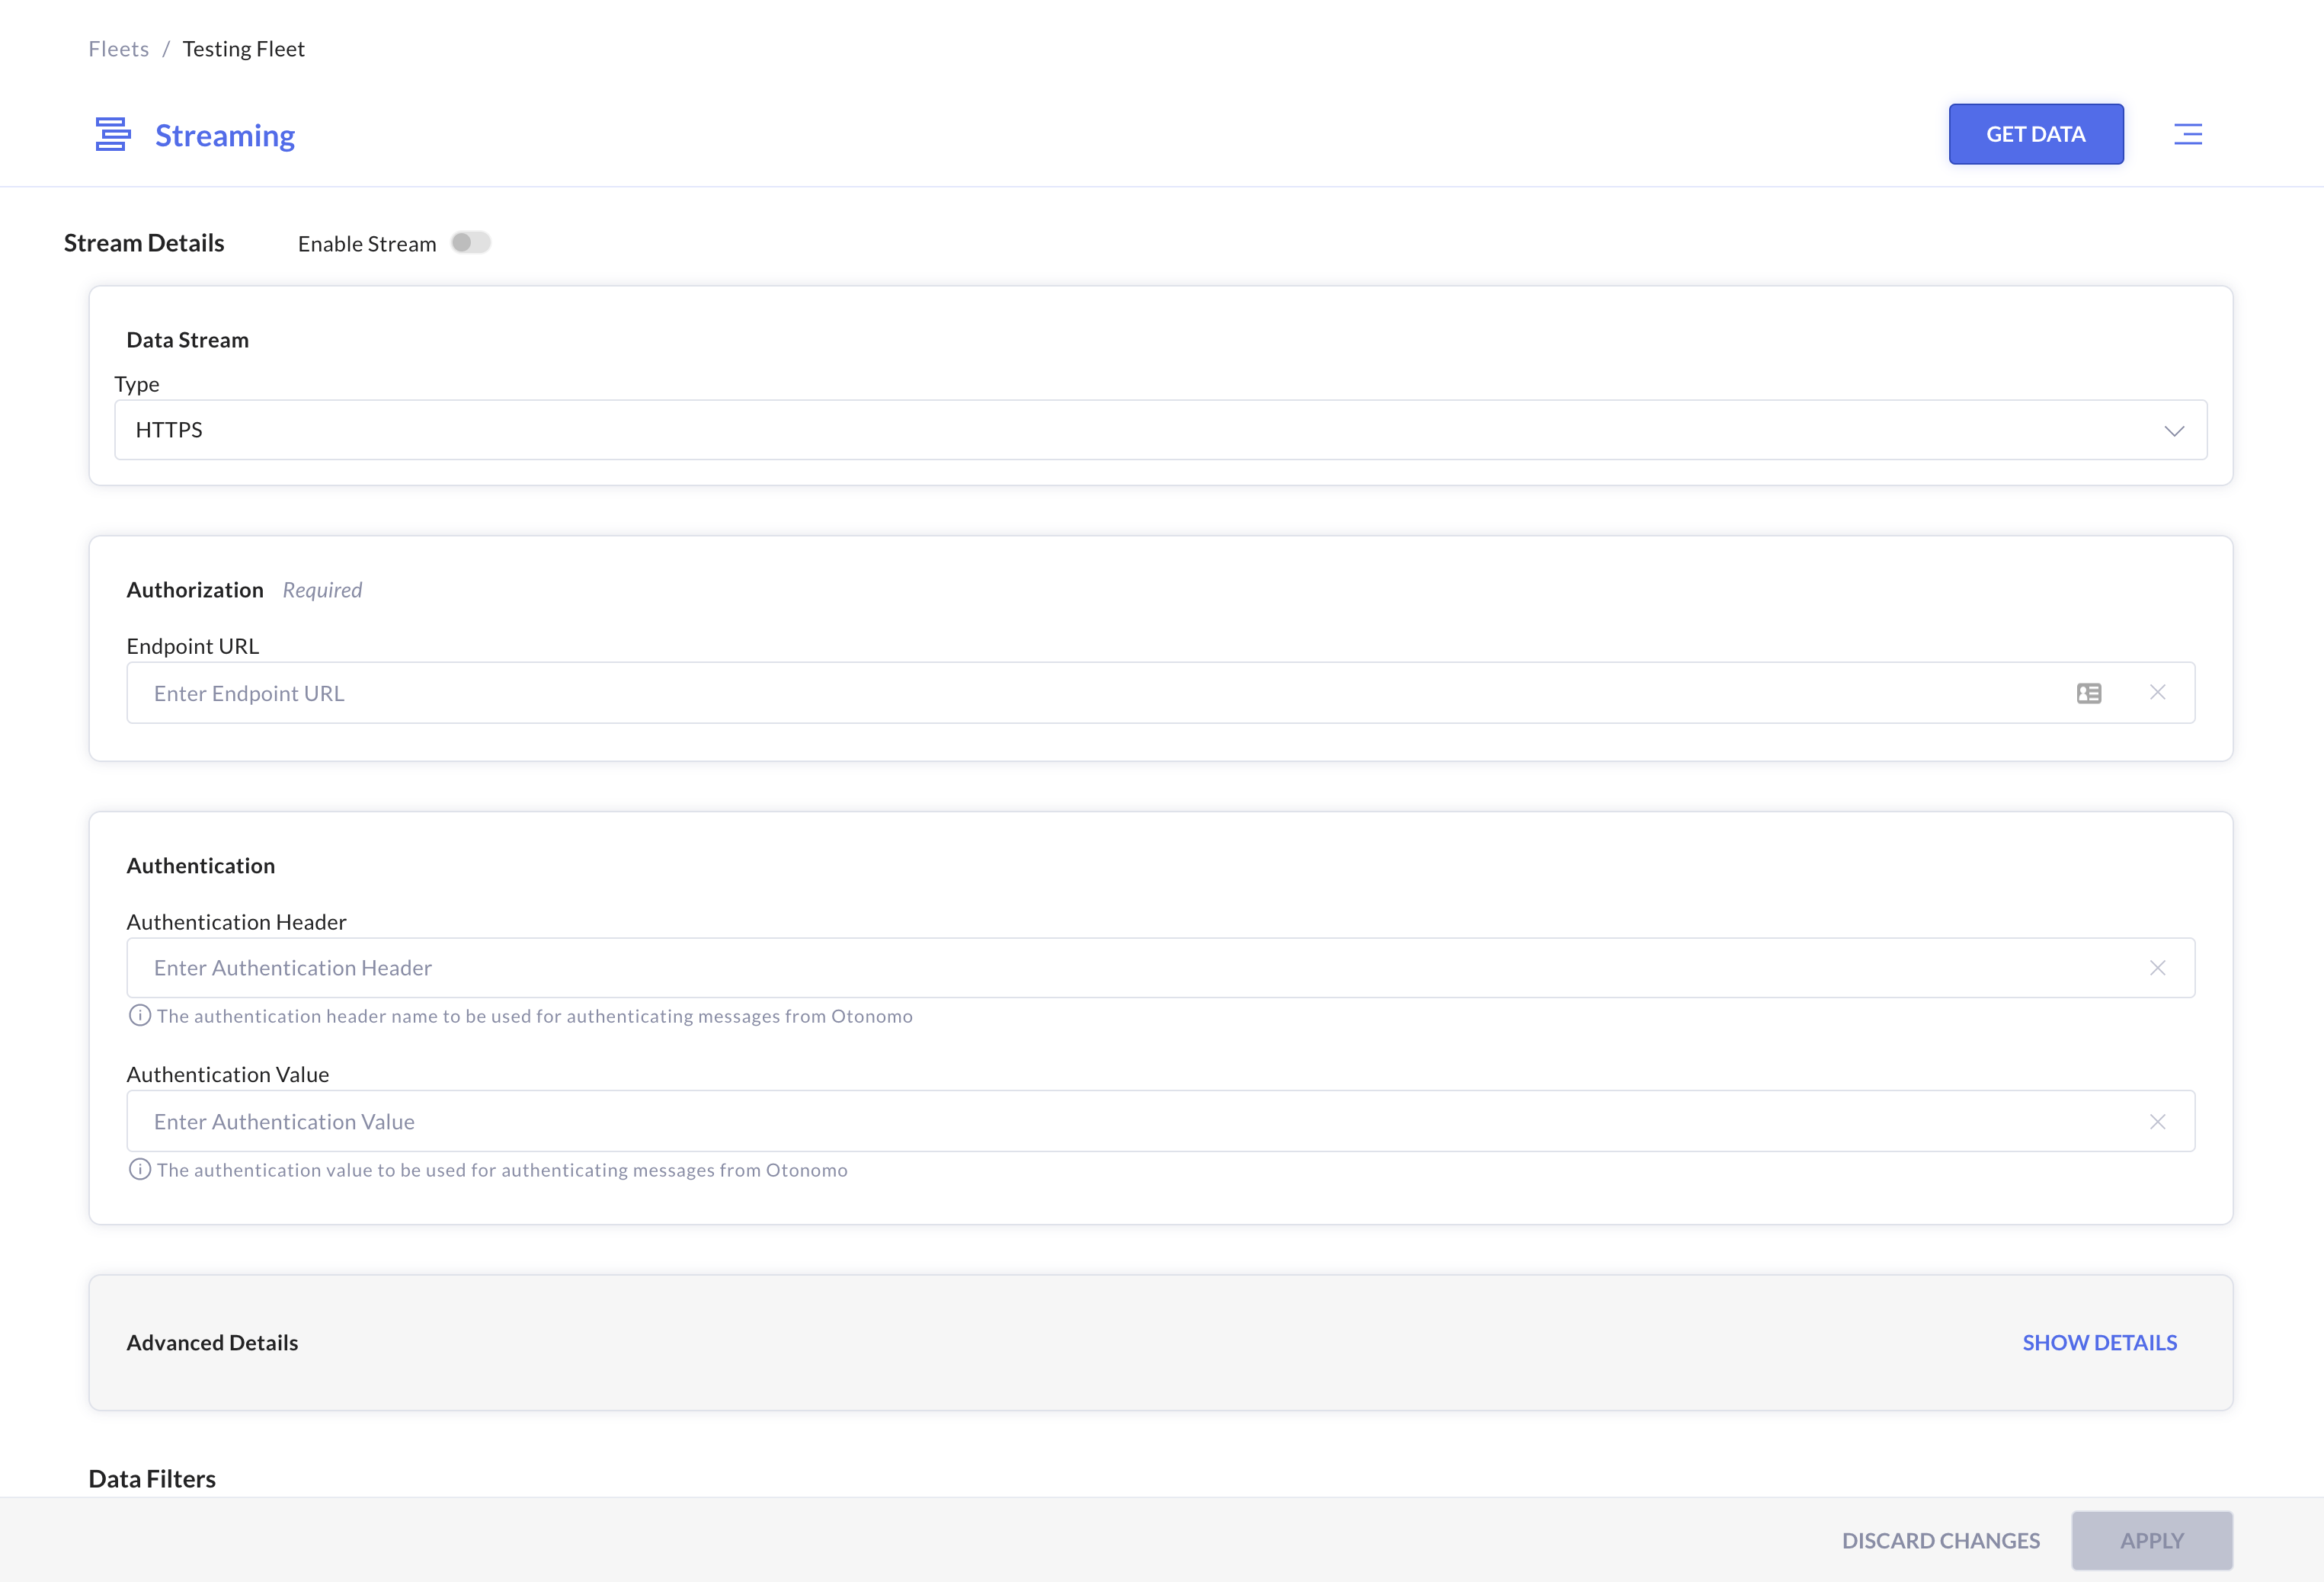
- Streaming page is displayed
Step #2: Streaming Interface Properties
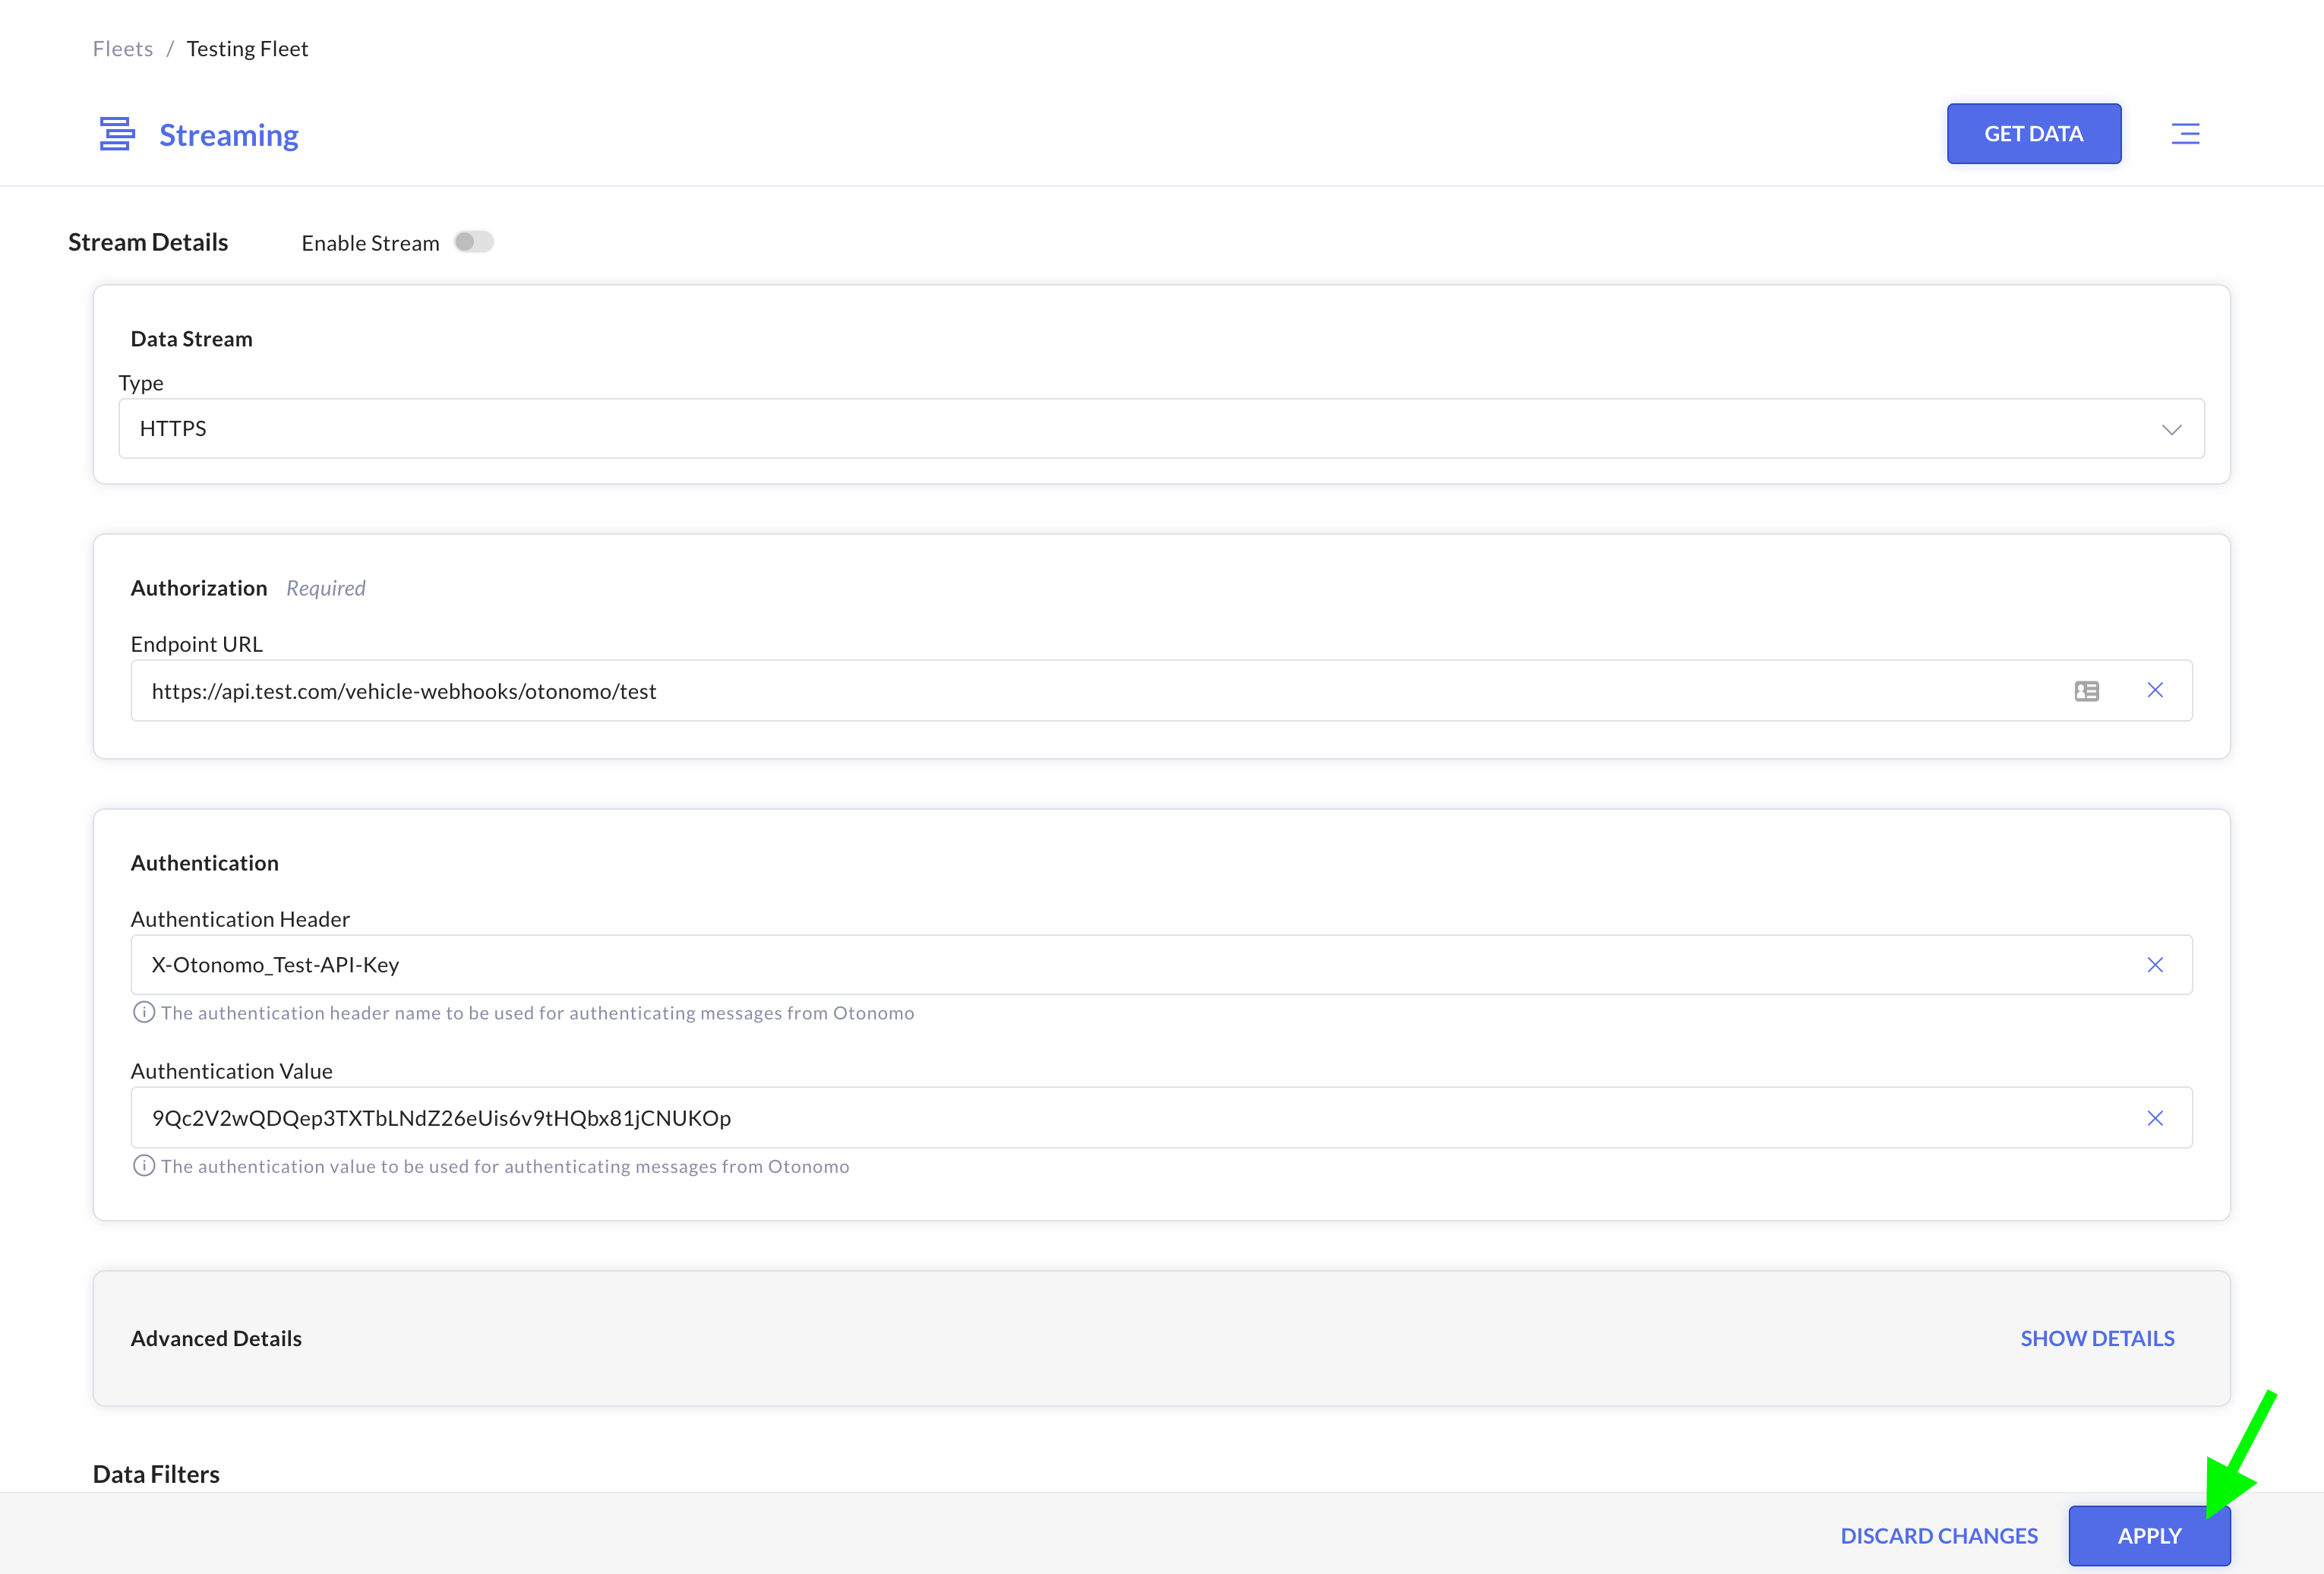
Fill in the correct properties of the stream, to create the streaming interface for the selected fleet:
- Data Stream Type
Select one of the following options:
HTTPS or Kinesis

HTTPS
See the configuration example below if 'HTTPS' is selected
- Authorization
Enter the Endpoint Url of the stream destination.
Example: https://api.test.com/vehicle-webhooks/otonomo/test

- Authentication
Enter the correct Authentication properties:- Authentication Header: X-Otonomo_Test-API-Key
- Authentication Value: 9Qc2V2wQDQep3TXTUis6v9tHQbx81jCNUKOpbLNdZ26e

Kinesis Configuration Preconditions:
- Create a Kinesis stream in your AWS account
- Create a new role with the required permissions to write into the Kinesis stream:
- "kinesis:PutRecord"
- "kinesis:PutRecords"
- "kinesis:DescribeStream"
- Provide permission to Otonomo Lambda's role to assume your role with the permission of sending data to the stream.
- Otonomo Lambda's role will assume your created role to send data to the stream.
- Otonomo Lamba's role:
Please reach out to [email protected] we will provide you the role arn by email.
Kinesis
See the configuration example below if 'Kinesis' is selected
- AWS Identity and Access Management (IAM)
Enter the correct AWS IAM properties:- Stream Name: The accurate name of the resource as exists on AWS.
- Role Amazon Resource Names (ARN): arn:aws:iam::349504393143:role/Otonomo-Kinesis-Test-Access-Role
- Region: us-east-1

- Advanced Details


Clarification
This section's properties are auto-generated when the stream configuration is completed and the stream is created successfully!
Step #3: Data Filters
- General
Maximum Latency [in seconds] - Enter the desired value to filter out data with latency higher than the selected value.

- Streaming Timeframe (UTC)
Select the relevant timeframe (in the day) to filter out data that was being generated out of this timeframe- 'All Day' option is marked by default:

- Or you can define a specific time frame:

- multiple timeframes are supported as well

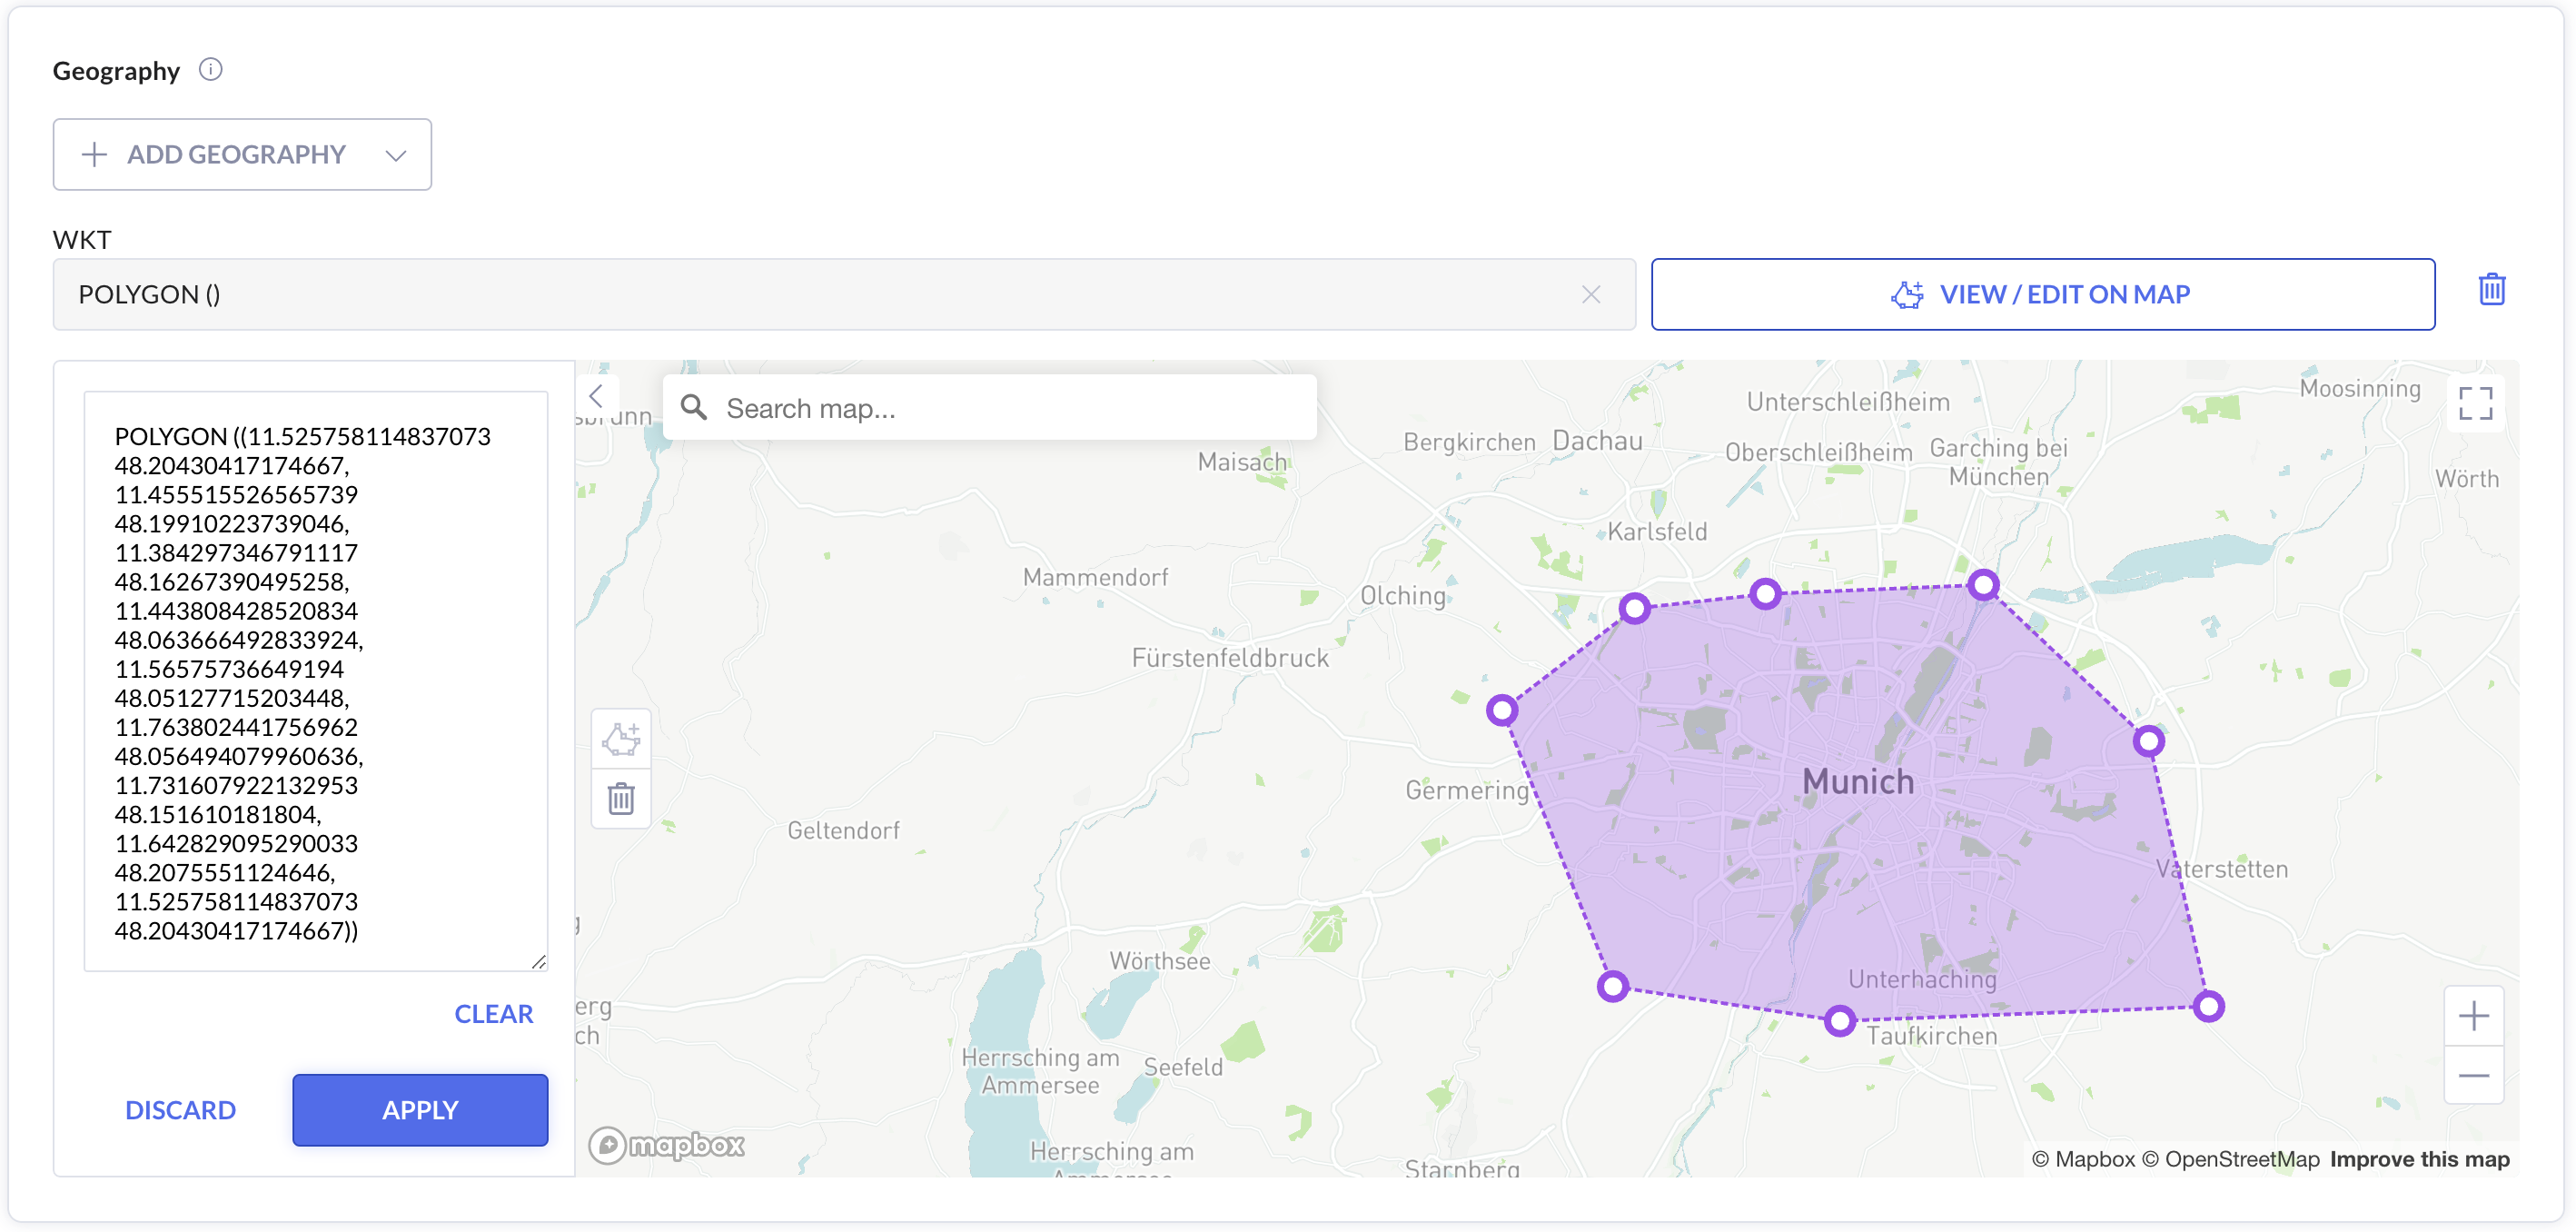
- Geography
Select specific geography to filter out data that was being generated outside of this geography, by pressing the 'ADD GEOGRAPHY ' button:

You can choose one of the following methods:
- Add Location:
Press the 'Add Location' option, and define the following:
Country, State & City

- Add Polygon on Map (WKT): Draw a polygon on the map or define the geography by positions in WKT format

Step #3: Apply Configuration
Press the APPLY button (on the bottom right side) to define the configuration properties and complete the streaming creation.
The following banner will get displayed (on the top right side) once the streaming creation is in progress:

The following banner will get displayed (on top right side) once the Streaming creation is completed:

Upon streaming creation completion, the 'Enable Stream' toggle will be activated for usage and marked as enabled.

You can always use the 'Enable Stream' toggle to change its status from On to Off or vice-versa

Step #3: Update Streaming Configuration
You can update one or more of the streaming properties and then press the 'APPLY*' button.
The following banner will get displayed (on top right side) to confirm update completion:

Updated 11 months ago
